
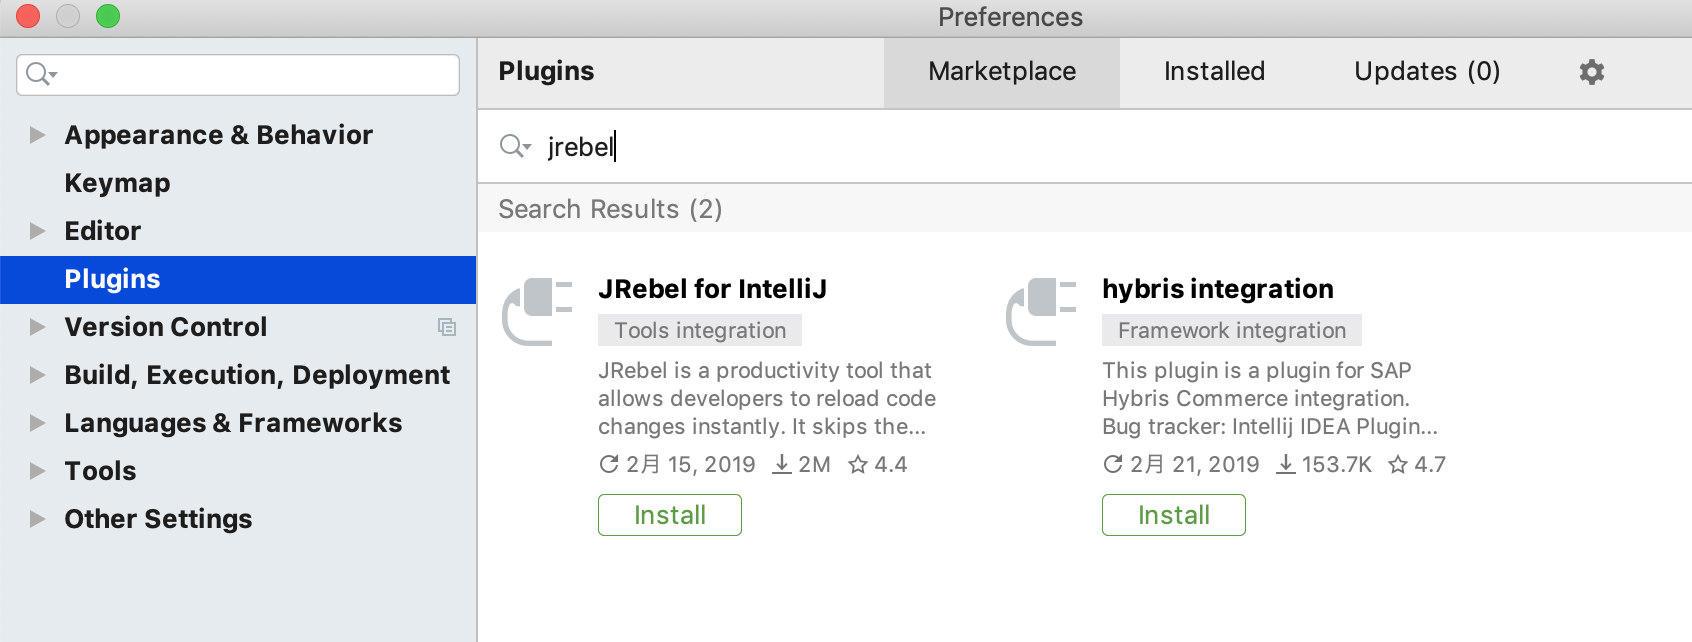
1. プラグインをインストール
設定 > Plugins > Marketplace よりプラグインの検索画面を表示し、JRebel for IntelliJを検索します。
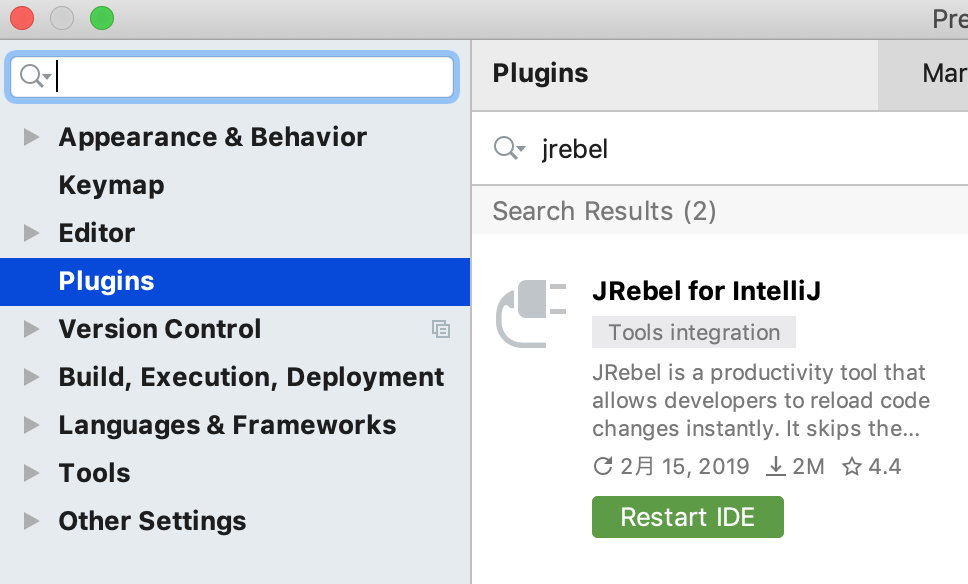
インストールが完了したら”Restart IDE”をクリックしてIDEを再起動します。
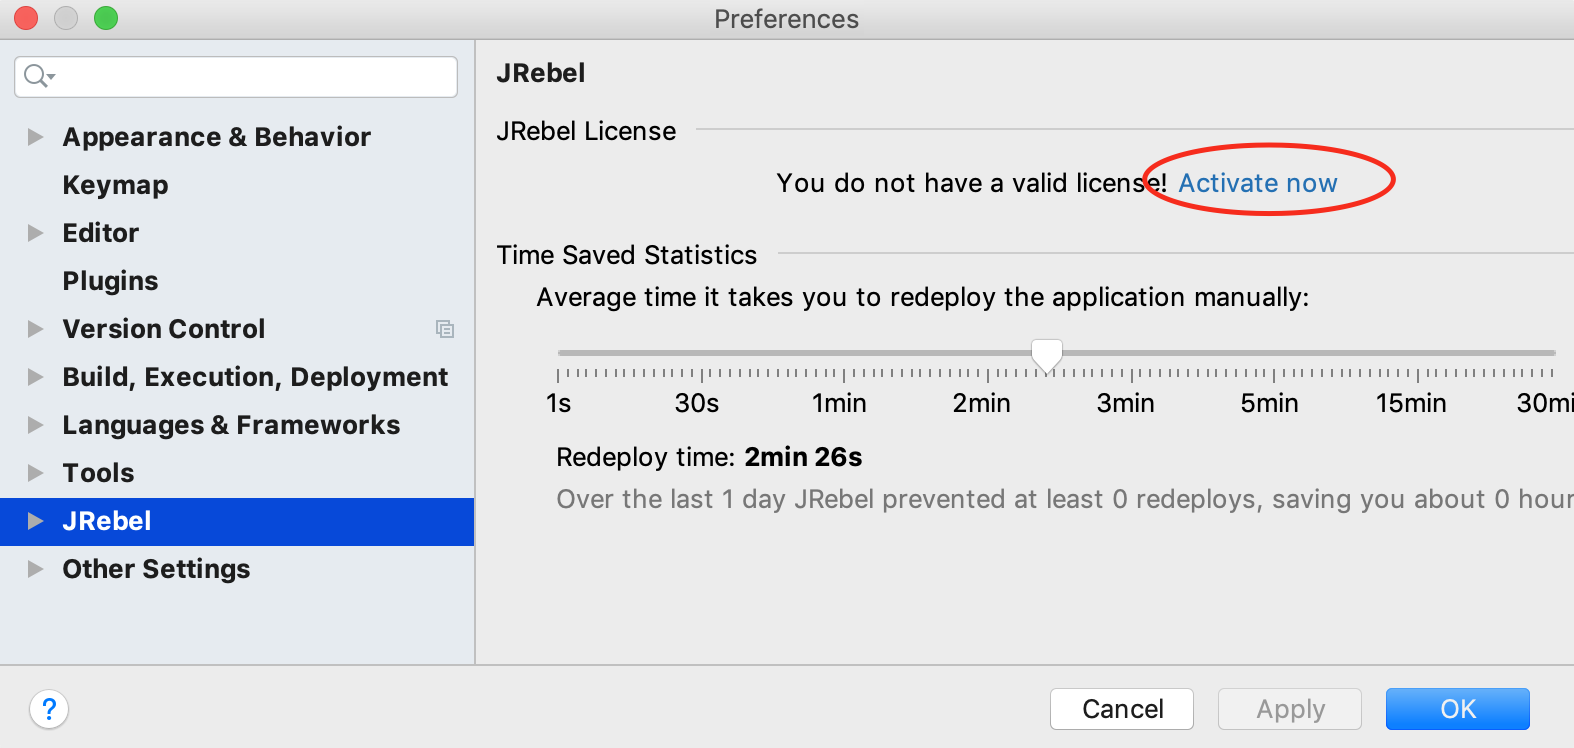
2. アクティベーション情報の入力
設定 > JRebel を開き、”Activate now”または”Change license”をクリックします。
“I already have a license”タブを開きます。
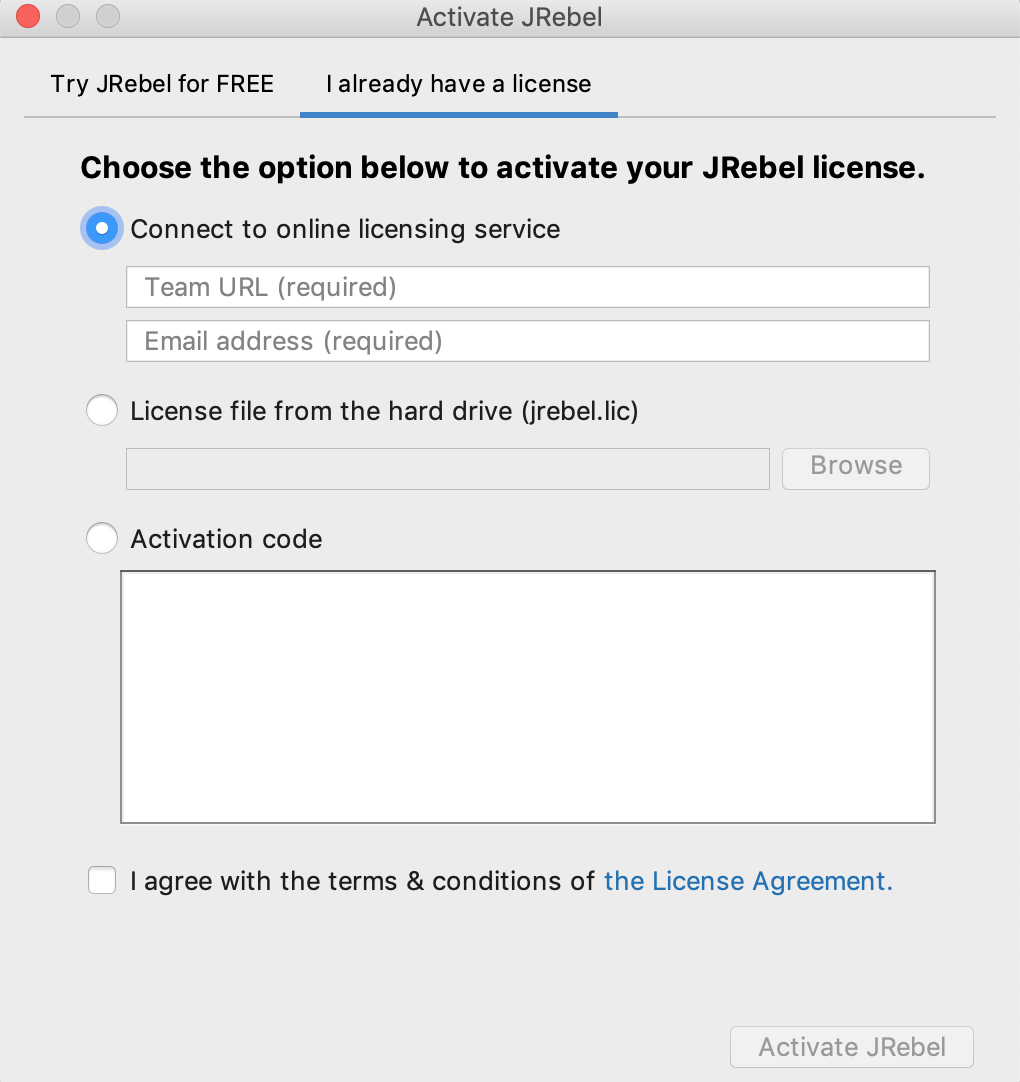
・ライセンスサーバを使う場合
“Connect to online licensing service”にチェックを入れ以下を入力します。
Team URL: チームのURL
Email address: ご自分のメールアドレス
・ライセンスファイルを使う場合
“Choose license file from the hard drive(jrebel.lic)”にチェックを入れ、”Browse”をクリックしてjrebel.licファイルの場所を指定します。
・アクティベーションコードを使う場合
“Activation code”にチェックを入れ、テキストエリアにアクティベーションコードを貼り付けます。
3. アクティベート
“I agree with the terms & conditions of the License Agreement.”に利用規約に同意の上でチェックを入れ、”Activate JRebel”または”Change license”ボタンを押してアクティベート完了です。